Guide to include ViaAds on a DanDomain Webshop

The following is a guide that describes the process of installing and setting up the ViaAds App on your DanDomain Classic webshop.
Once the guide is completed, it won't be long before data is communicated automatically to ViaAds, which can then begin marketing for your webshop. The guide is designed not to require extensive technical skills to complete.
The following guide consists of 3 parts:
- Creation of an API key, which is to be provided to ViaAds for synchronization of order and product data
- Implementation of ViaAds Script for collecting behavioral data on customers, aswell as implementation of the ViaAds Script for setting a cookie, based on the customers marketing preference.
- Implementation of a WebHook, which forwards a newly created order to ViaAds immediately, which is used to perform extraordinary retargeting.
Create API key in DanDomain
Below is a guide on how to create API access in DanDomain, which is needed by ViaAds to perform the necessary synchronizations.
- Log into the backoffice
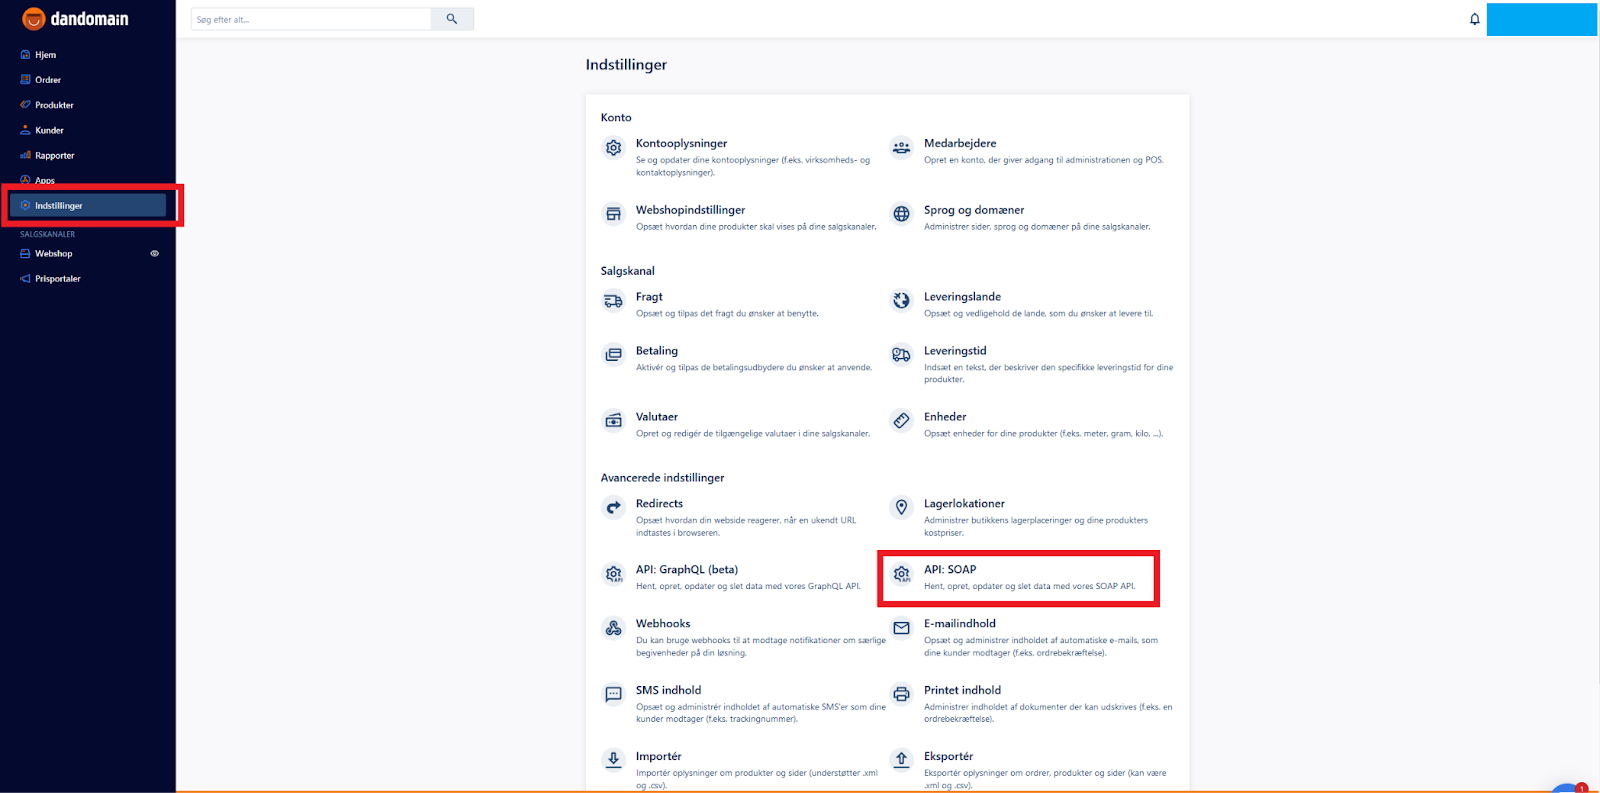
- Select Indstillinger from the menu
- Select API: SOAP
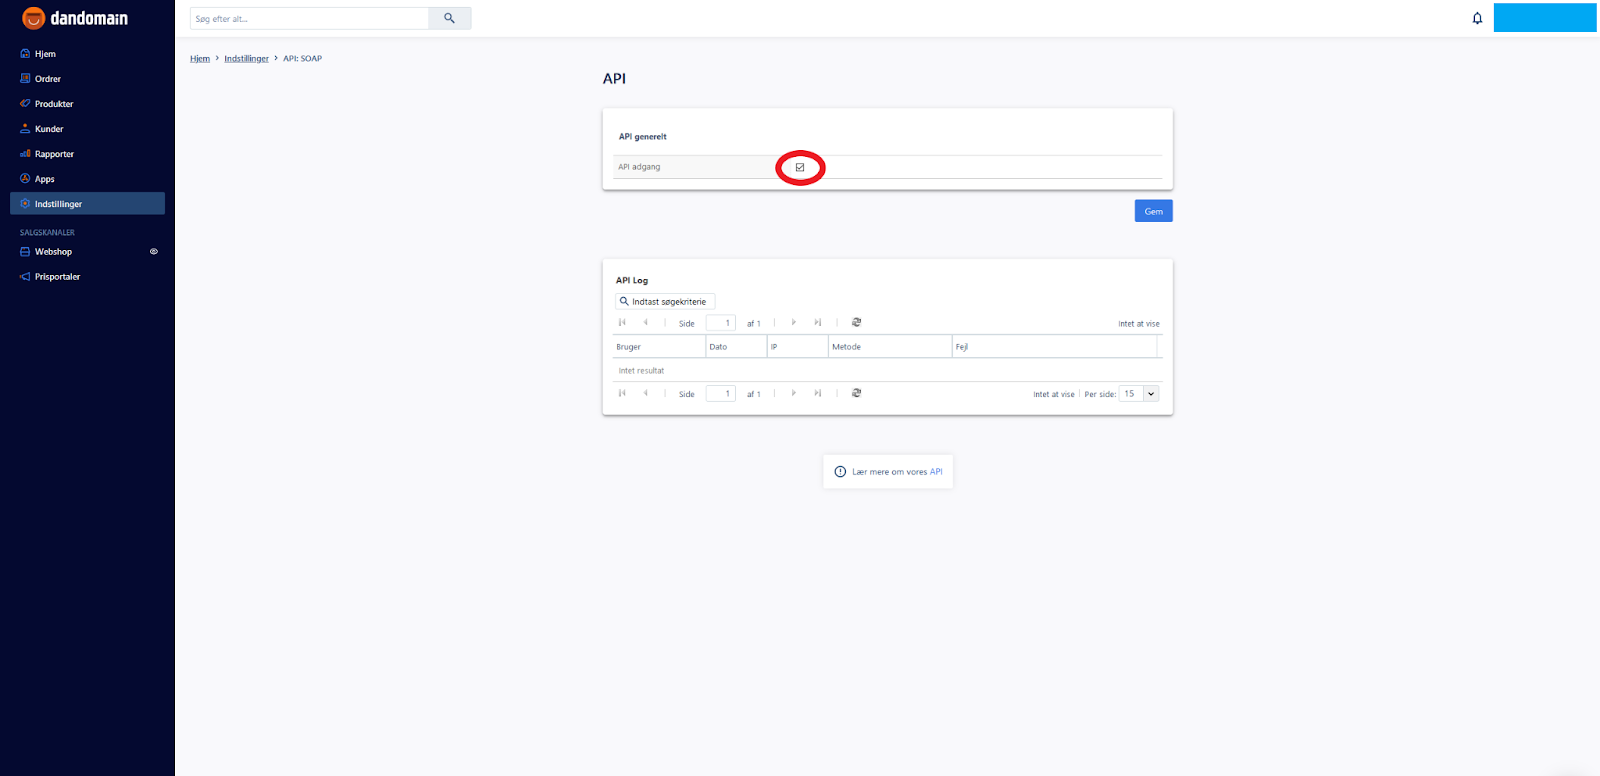
- Check the box for API adgang
- Save
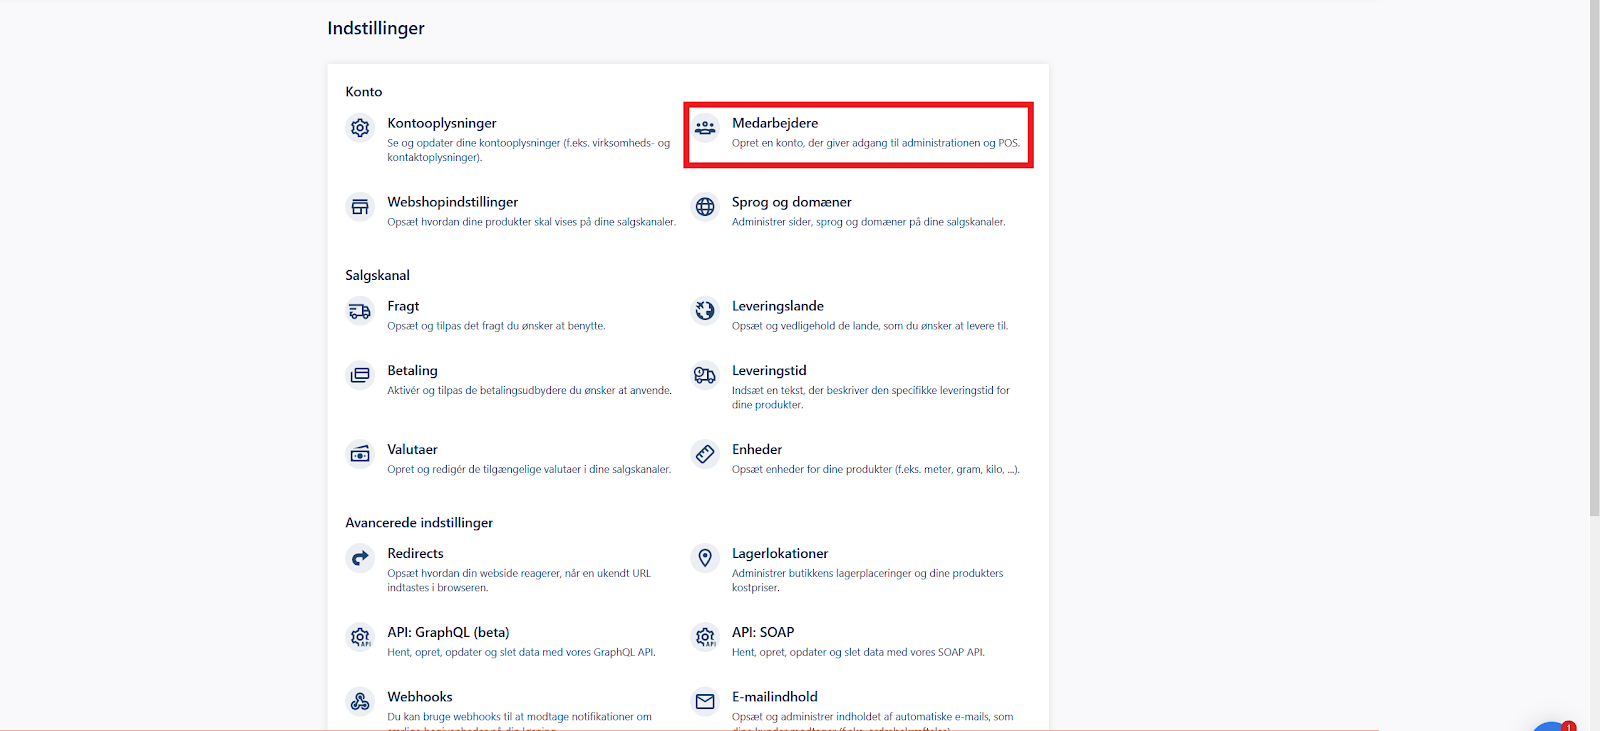
- Select Indstillinger from the menu
- Select Medarbejdere
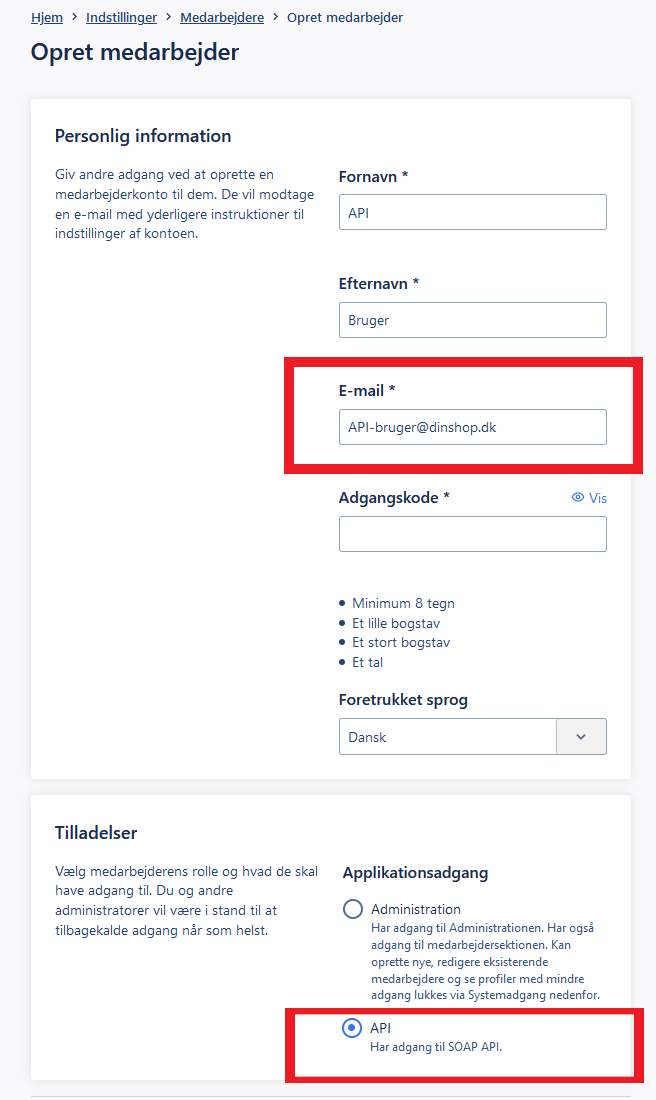
- Select Opret medarbejder

- Enter information for your new user (Note! You must not use your own email. It must be a new user/email dedicated solely for API access)
- Under tilladelser, check API
- Select Gem
This API user's information is now to be forwarded to ViaAds, which establishes a connection to the shop.
Implementation of ViaAds Scripts in DanDomain
Below is a guide to implementing ViaAds Scripts in DanDomain
- Select Design from the menu under Webshop
- Select Handlinger under Design Manager
- Then select Indsæt JavaScript in the open dropdown menu.
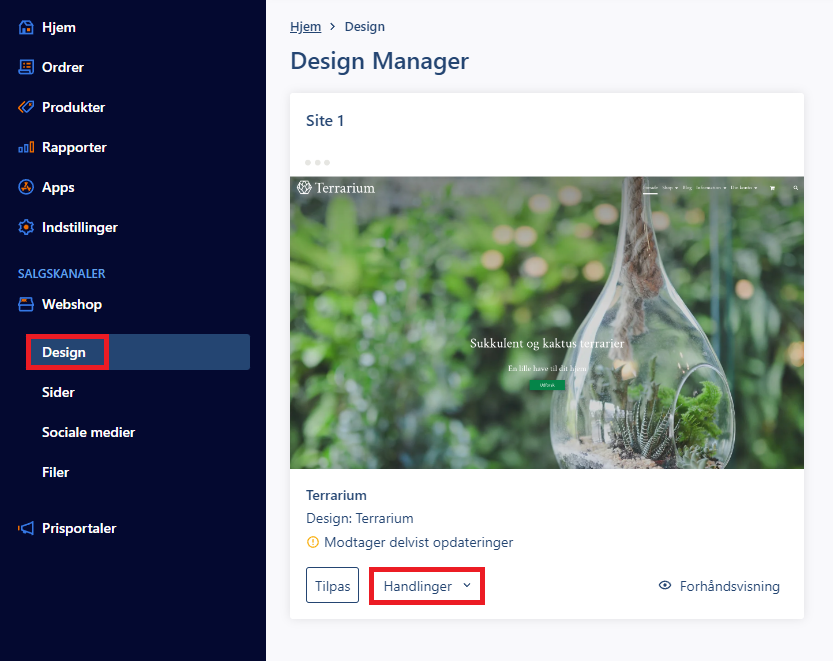
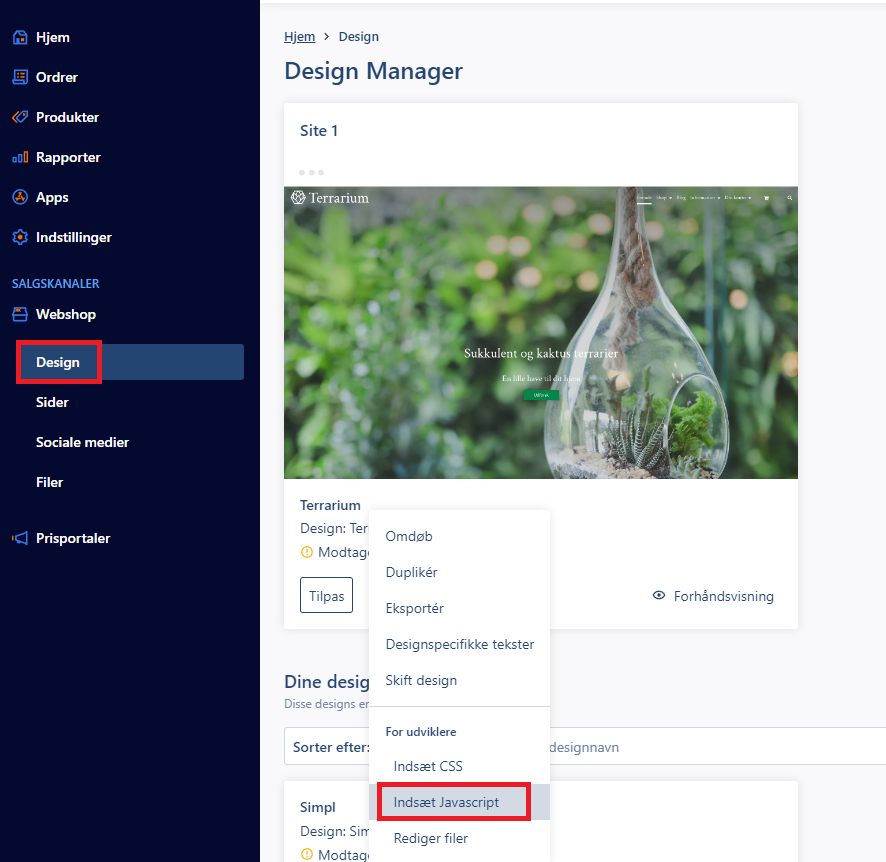
- Insert the following script tag in the input field right of Javascript:
Script:
<script>
(function(){
var o=document.createElement('script');
o.type='text/javascript';
o.async=true;
o.src='https://files.viaads.dk/plugins/min/danDomain.min.js';
var s=document.getElementsByTagName('script')[0];
s.parentNode.insertBefore(o,s);
})();
</script>
- Select Gem
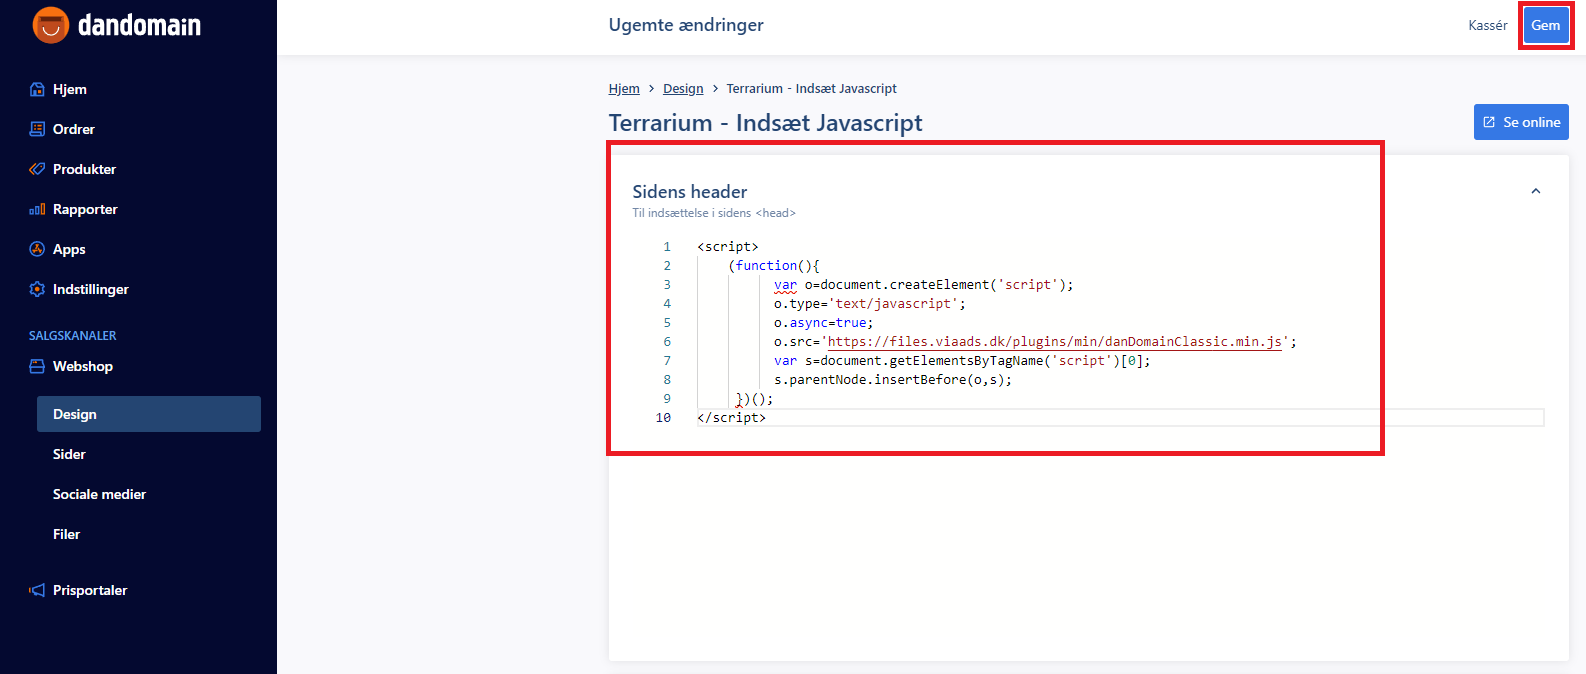
This concludes the implementation of ViaAds Scripts.
Implementation of a Order Created Webhook for ViaAds
This is used to perform even better retargeting, as we are able to analyse and use the order data right away and not having to wait for the next synchronization to take place.
Below is a guide on how to set this up.
- Log into the backoffice
- Select Indstillinger from the menu
- Locate and Select Webhooks
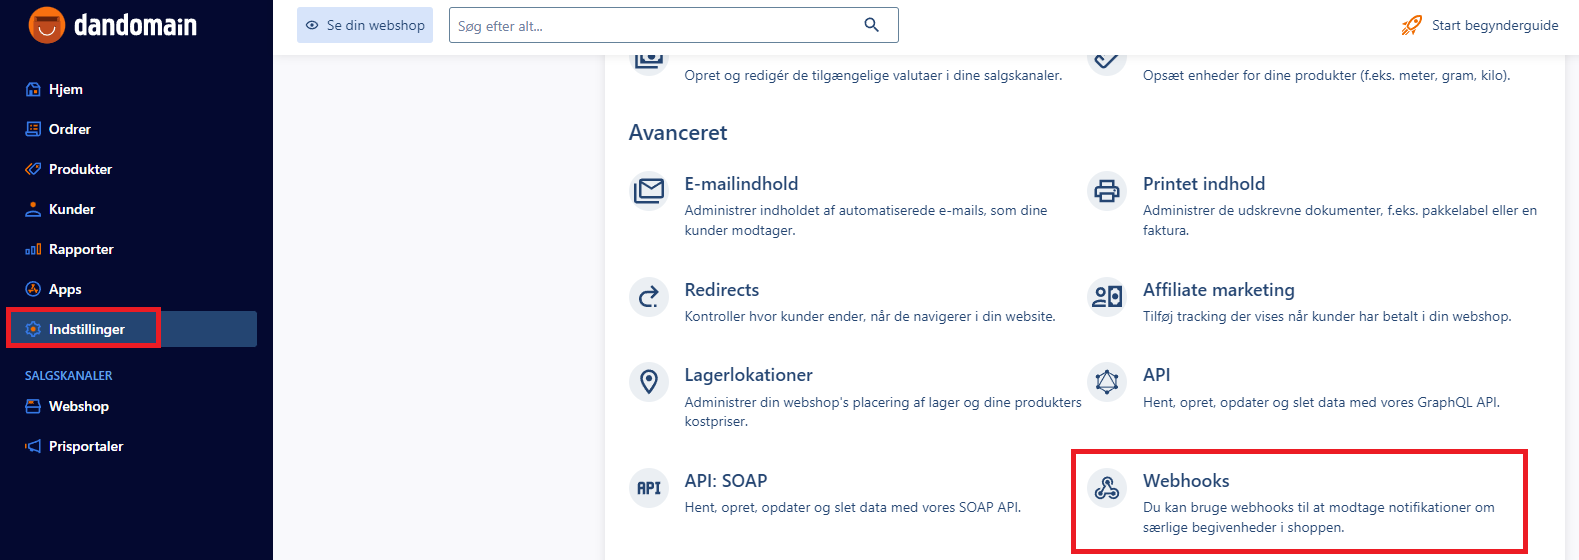
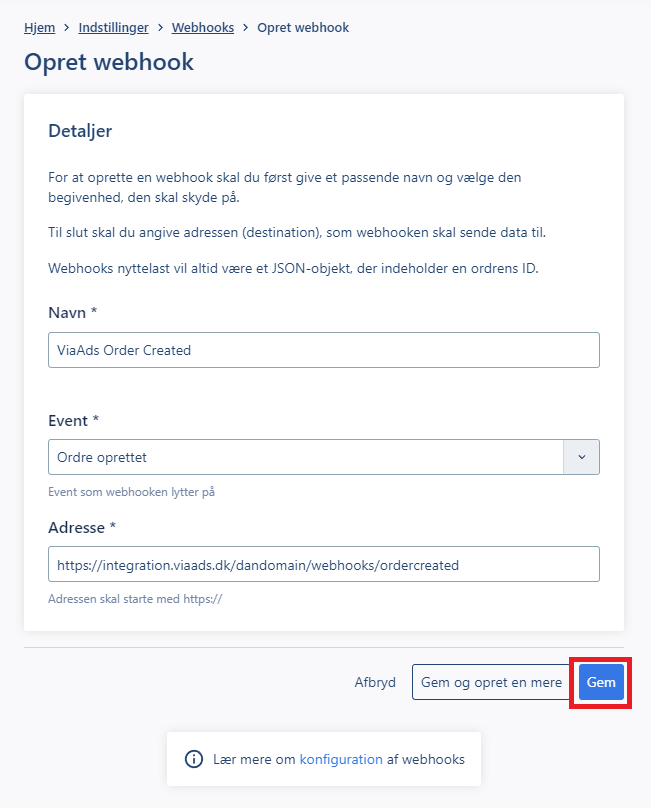
- Select Opret Webhook

- Provide the Webhook with a Name e.g. ViaAds Order Created
- Select Ordre Oprettet in the Event dropdown
- Insert https://integration.viaads.dk/dandomain/webhooks/ordercreated in the Adress field
- Select Gem
It should now be visible on the Webhooks list

- Select Token
- Copy the Token value and forward this along side the API User Credentials to ViaAds
This concludes the implementation of ViaAds Order Created Webhook.
After completing this guide, a full synchronization of the webshop's order and product data will be initiated, and tracking of customer behavior will also begin. Within 48 hours of completing the synchronization, enough user behavior data will be collected to begin sending email marketing material related to this webshop.
Custom order statusses
When using custom order statuses to indicate that an order has been cancelled, refunded, or partially refunded, it is necessary to provide this information to ViaAds. Additionally, along with the custom order status, a clear explanation of its meaning must be included in order for us to be able to refund the correct amount charged for the order that was provided by ViaAds.
By providing this information, we can ensure that our records are accurate and up-to-date, and that any refunds are processed correctly. Therefore, please make sure to communicate any custom order statuses and their meanings clearly and in a timely manner to avoid any delays or issues with refunding.
